With insights from Jerod McCluggage, here’s a step-by-step walkthrough for staining a reclaimed wood barn door. We cover everything from initial preparation and supplies to the final application.
In this detailed guide, you will learn the finer points of staining a reclaimed wood barn door.
Jerod McCluggage is our Reclaimed Barn DIY expert. Stop by our location in Columbus, Ohio or give us a call, and he can help you with a wide range of projects. He’s interested in just about everything when it comes to DIY and happy to share what he’s learned.
In his free time, he recently built a 176 sq. ft. self-sufficient, tiny house complete with a loft. The house runs on solar power and has a rain collection water system with four built-in filters.
Because of the Ohio zoning laws, he decided to sell it. And since then, he’s been restoring a 1985 camper that he and his wife take on trips throughout Ohio and across the country.
If you’re like most people, you probably won’t be attempting to build a small house, or gut out, restore, and upgrade an old-school camper any time soon.
But if there’s a DIY project that’s doable for nearly everyone, it’s staining wood. To show you how, Jerod demonstrates the process from start to finish.
The Project: Staining a Poplar Reclaimed Barn Door
The customer wanted a slate grey, retractable sliding reclaimed wood barn door for his basement as a unique yet functional way to separate a game room from the rest of the space.
He chose a beautifully-crafted, 71” x 81” reclaimed embossed poplar barn door from Schlabach.
Jerod used Rubio Monocoat, a high-quality hardwax oil stain.
What You Will Need For this Project
- Gloves
- Rags or Terry Cloth
- Bucket
- Raw Wood Cleaner
- Applicator Pads
- Barn Door
- Rubio Monocoat Hardwax Oil Stain
When you set up your work environment, opt for a flat work surface and something to hold up the wood. Jerrod used two sawhorses. You will also want to have a section to place your supplies. A large piece of cardboard works just fine.
Safety Tip: : DO NOT place any used rags together in a trash bag or they can catch fire. The bucket is an unsung hero, giving you a space to keep everything and prevent spontaneous combustion. This is good to remember before you start.
Sanding?
For this project, no sanding was necessary. Sanding reclaimed wood erases its character.
You can do light sanding, but you don’t need to sand reclaimed wood prior to staining.
Before staining other types of wood though, you generally will want to sand it at the recommended grit (180-220).
Step 1: Clean the Wood with a Raw Wood Cleaner
The first step toward applying stain is to clean the wood using a special cleaner. For the best results use Rubio Monocoat Raw Wood Cleaner.
This will ensure the wood is clear of any debris or dirt that would otherwise affect the outcome of the stain.
Optional Step: Apply the Pre-Color
The customer wanted a more contemporary look, so he didn’t want the yellow undertones of the poplar to be seen through the stain. Jerrod used Rubio Pre-Color easy to create the right base tone and color for the grey slate stain.
You can apply Pre-Color Easy the same way you do stain, but it dries faster and is more watery to work with.
Step 2: Separate the Surface into Sections
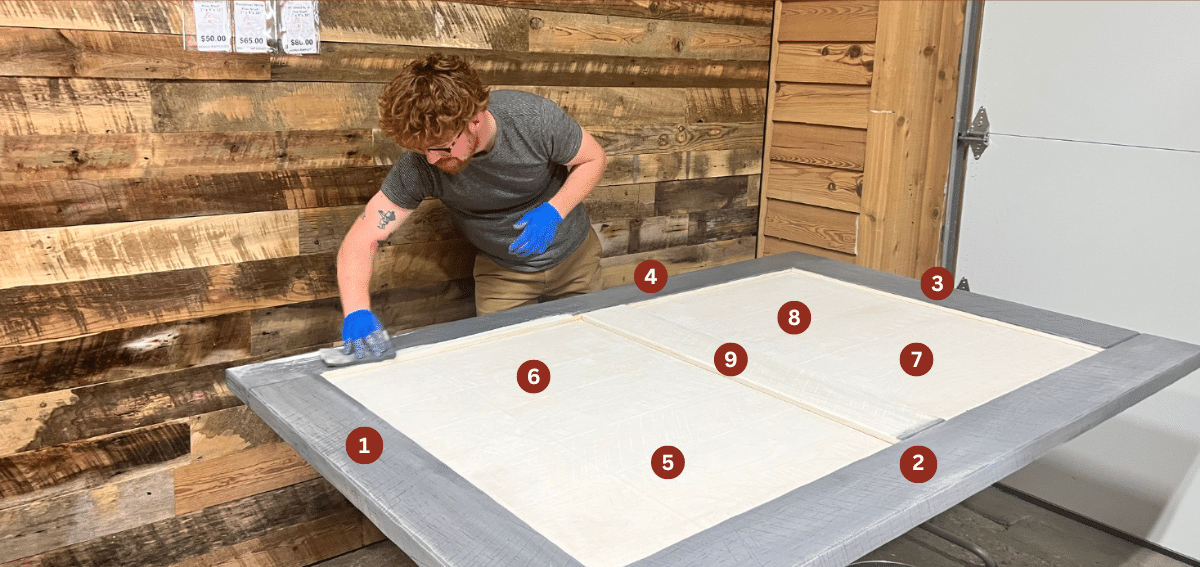
Before you stain, you will want to separate the surface into sections.
Having the sections in mind when you begin will help you determine where to start, where to blend, and where you will end. It also ensures a good and even stain.
Jerod started with the outside edges and worked in.
Step 3: Apply the Stain
Pour a little bit of stain directly onto the surface and push and pull it with an applicator to spread it around like Daniel-San from The Karate Kid.
Leave the stain on for 1-3 minutes to penetrate. Then wipe it off evenly, buffing it in with a rag or terry cloth.
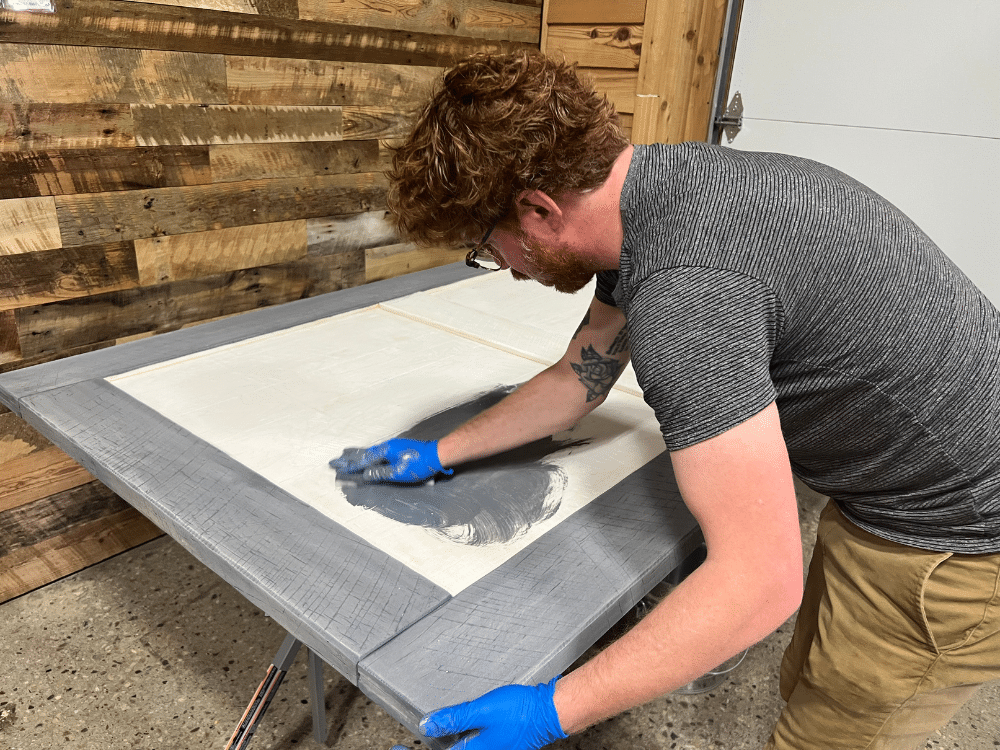
As you’re staining, you will get to a point where the stain is sticking into the wood, and you won’t be able to go to the next section.
When this happens, you will want to switch to the rag or terry cloth, wipe it off, and then move onto the next section, making sure to blend the stain from section to section.

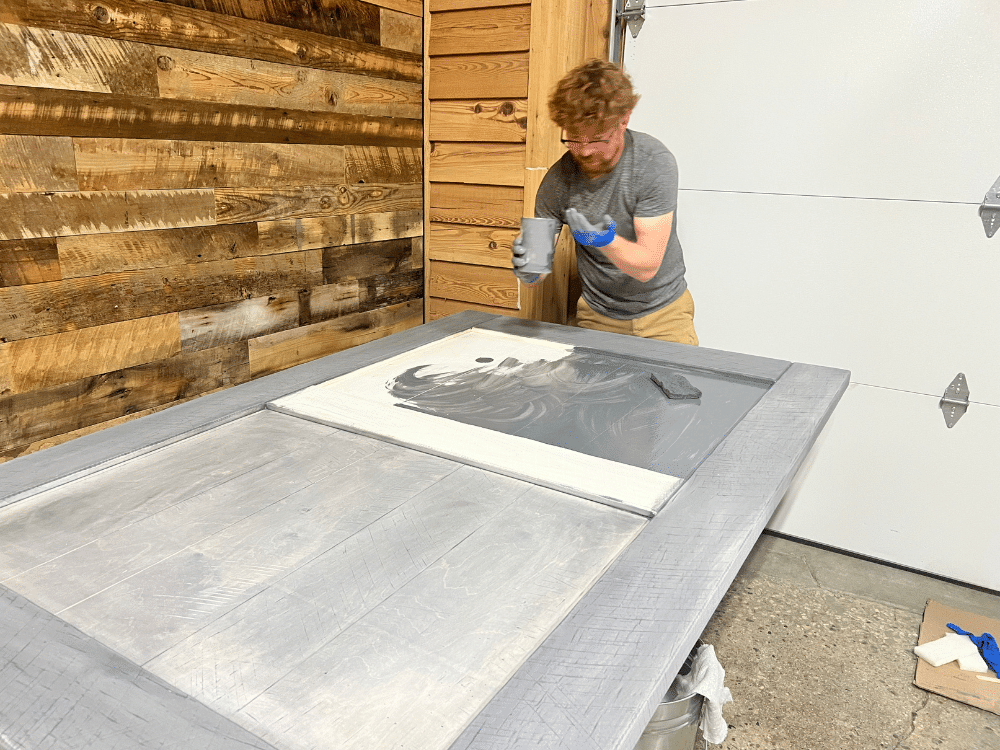
Pro-tip for applying stain: Avoid pooling the stain or it will become darker. You want a good uniform color and shade. Rubio stain goes a long way, so you can use a little and spread a generous amount across the surface.
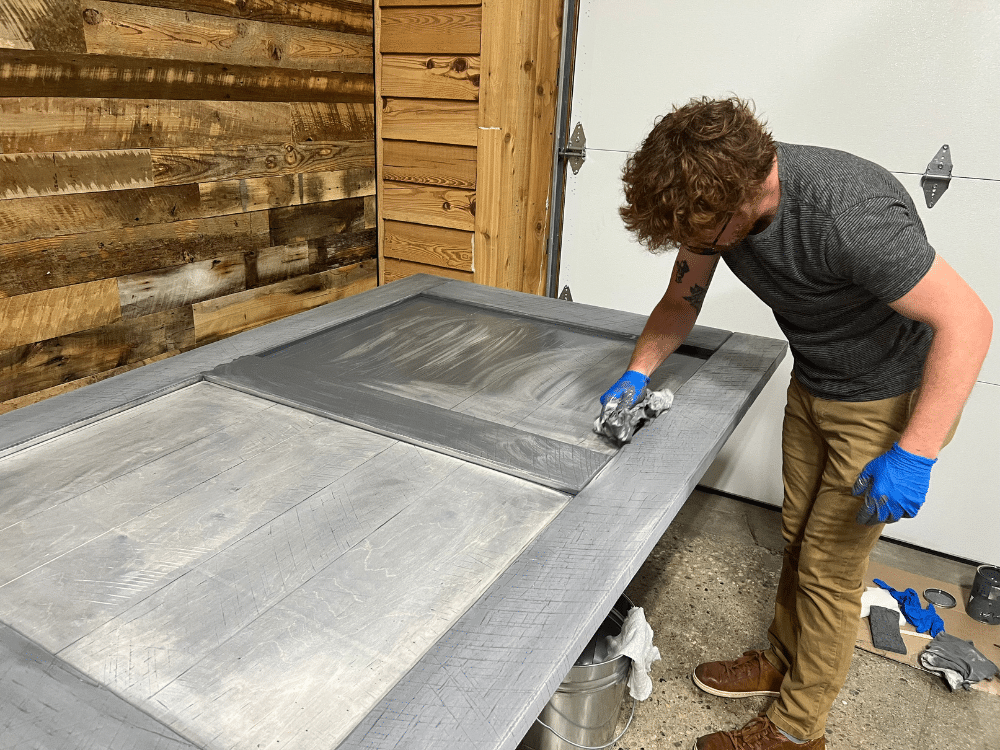
The way the stain dries depends on the wood. You can notice that the outside of the door is a different and darker shade than the paneling.
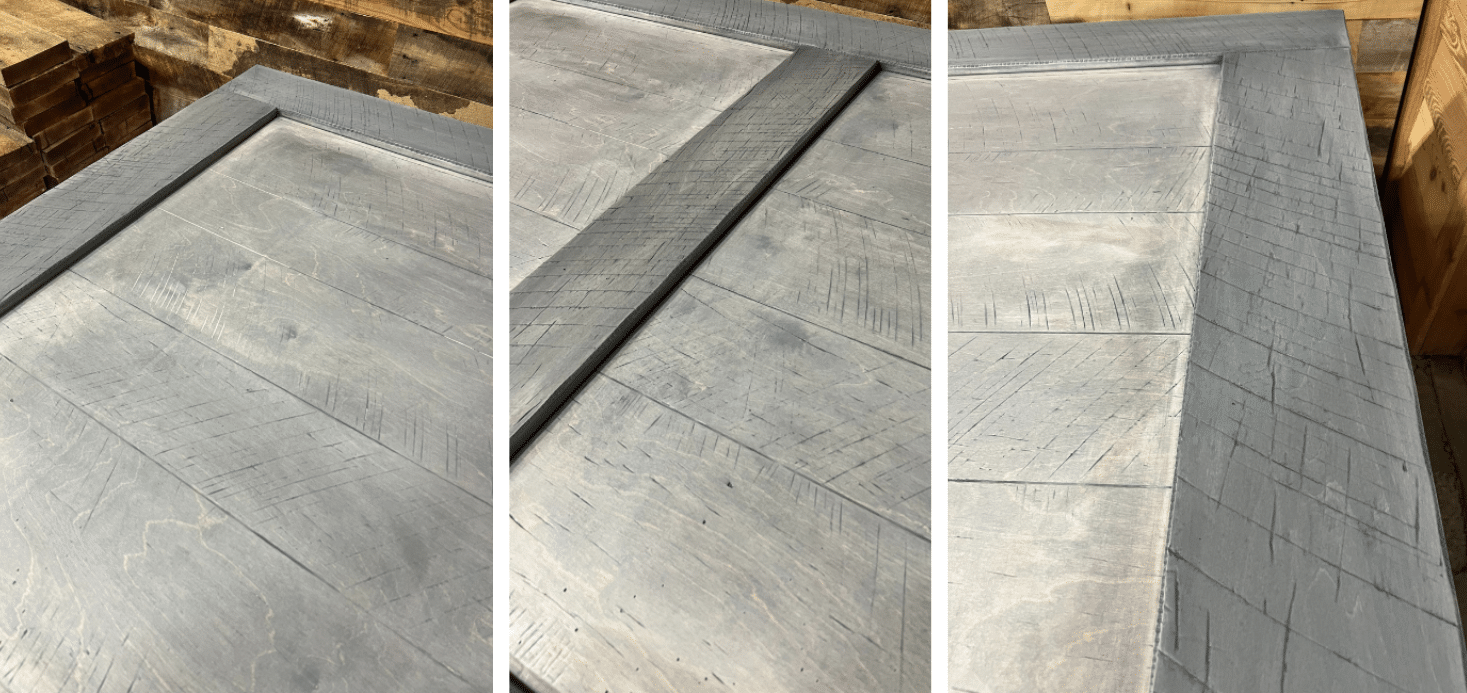
“Rubio is one of the best stains I have ever used. It’s one of the easiest stains to work with and the finished product is unmatched.”
– Jerod McCluggage
You can use this staining method for any piece or species of reclaimed wood. Jerod followed the same procedure using Rubio Oak stain for the white pine table top below.
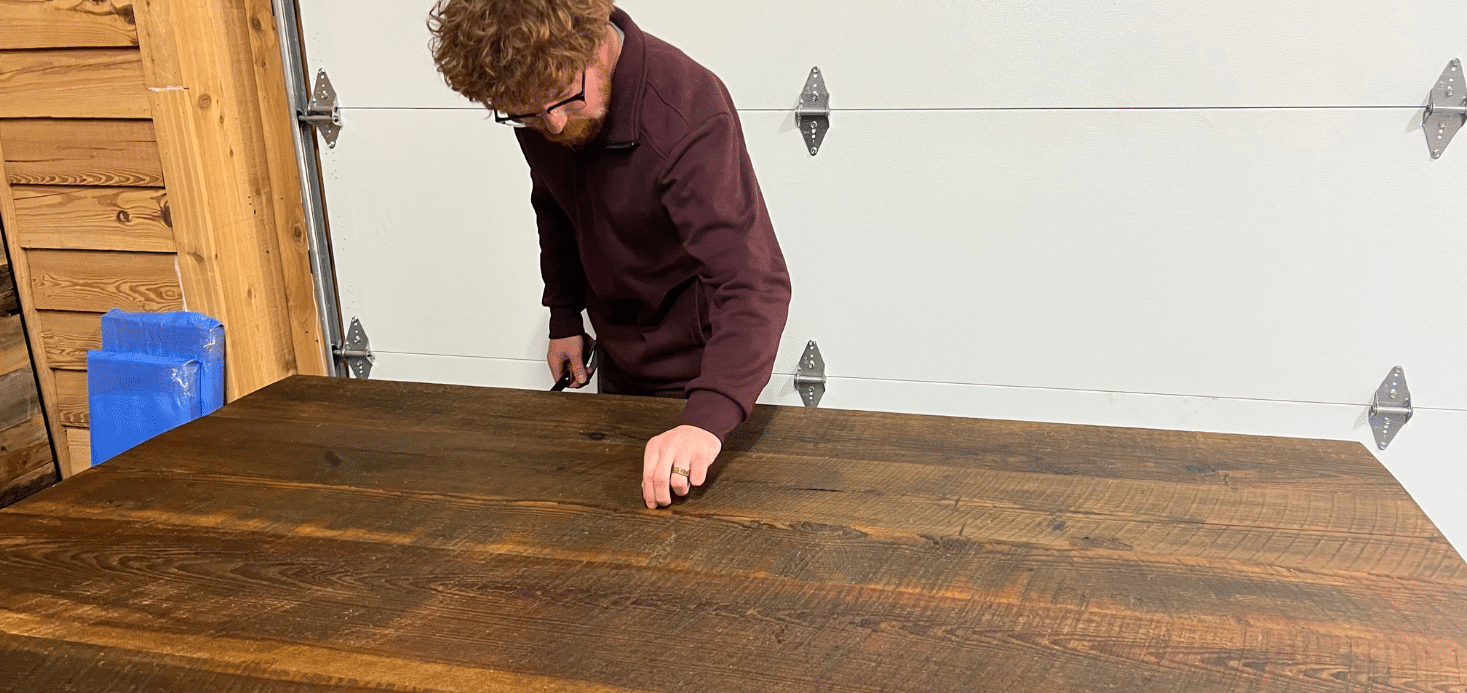
This table top turned out great with the stain enhancing the hit-and-miss marks from the saw.
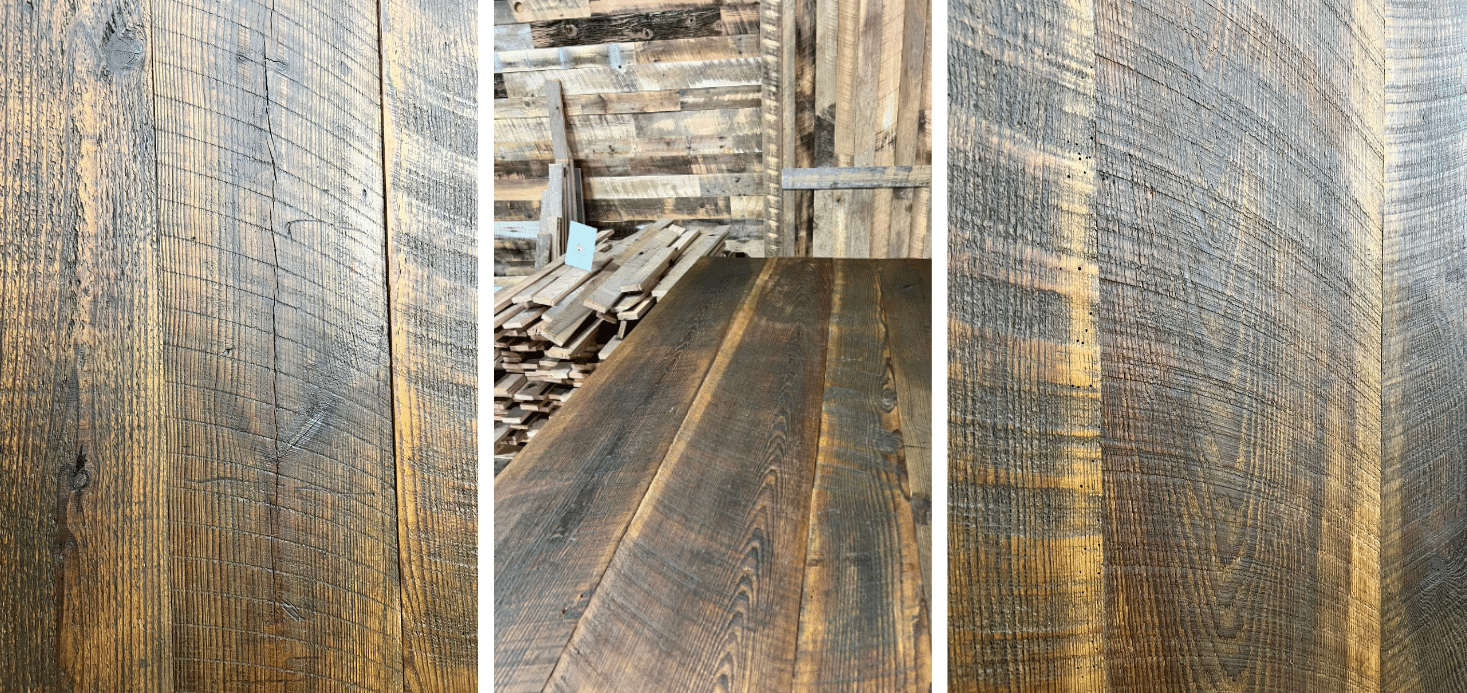
And you can see this wood in action on TV in an upcoming Donatos Pizza commercial!
FAQ
In this section, you can find answers to common questions about staining reclaimed wood.
Can you stain reclaimed wood?
Yes, you can stain any kind of wood, including reclaimed wood. The right stain will enhance the look and character of the wood while providing a layer of protection.
What kind of stain to use on reclaimed wood?
We recommend Rubio hardwax oil. Not only does it look great, it’s also DIY-friendly. With a hardwax oil like Rubio, you can do spot repair maintenance over time or whenever you notice imperfections.
This means that if there’s a noticeable scratch, you can simply apply a small amount of stain to the area, buff it in, and it will look as good as new.
Another great brand to consider is General Finishes.
Should you paint or stain your reclaimed barn door?
Choosing between paint and stain comes down to preference. However, most people buy reclaimed wood because they love the distinctive features and history of the wood.
Staining brings out the features of the natural wood grain, knots, and character, enhancing its overall look. Painting will cover everything that’s visible on the wood’s surface, including its rustic characteristics.
How do you stain a barn door to look rustic?
Stain amplifies the grain and any markings on the wood, so you need to be sure your barn door has the surface texture and overall look you desire before you begin staining.
If your door is lacking in character, you can emboss the wood to distress it before applying the stain. Rough it up with a wire-brush, strike it with a hammer, take a drill bit or chain and go to town, marking up the wood to achieve an old-time look.
No time for that? Order a reclaimed barn door!
What color should I stain my barn door?
The shade you choose comes down to your preference. There are many different color options, and colors can be combined for any shade or variation imaginable.
The best color for you will depend on what you like and on the existing look of your décor and space.
Do you apply stain with a brush or rag?
We recommend applying stain with an applicator pad and using a rag or terry cloth to wipe off the excess stain. Applicator pads are easy to use and inexpensive.
They’re also porous, so you won’t waste product as you would with a rag, which soaks up the stain. Avoid using a brush unless you want visible brush strokes on the finished product.
Summary
In this comprehensive guide, Reclaimed Barn’s DIY expert, Jerod McCluggage, walks us through the process of staining a wood barn door.
He emphasizes the importance of preparation, including cleaning the wood with a raw wood cleaner and optionally applying a base tone with pre-color.
The staining process itself involves spreading a small amount of stain evenly across the wood, allowing it to penetrate for 1-3 minutes before wiping it off.
Understanding how the stain will dry and react with the wood is critical to achieving a uniform color and shade. Following these steps will ensure a beautifully finished door that adds a rustic touch to your space.


